October 21, 2023
How To Deploy a Hugo Website on Netlify

Md. Saad

Deploying a Hugo website on Netlify offers an efficient and user-friendly way to share your content with the world. Hugo, a powerful static site generator, enables you to create fast and dynamic websites with ease. Netlify, on the other hand, is a cutting-edge platform that simplifies the deployment process and provides a seamless hosting solution for your Hugo-generated site.
In this guide, we will walk you through the steps to successfully deploy your Hugo website on Netlify. By combining the capabilities of Hugo's static site generation with Netlify's robust hosting and continuous deployment features, you'll be able to showcase your content to your audience without the complexities of managing server configurations.
From setting up your Hugo site to configuring it for deployment on Netlify, we'll cover each step in detail. Whether you're new to web development or an experienced user, this guide will help you get your Hugo website up and running on the Netlify platform smoothly.
So, if you're eager to take your Hugo site from a local development environment to a live, accessible web presence, let's dive into the process of deploying your Hugo website on Netlify.
Deploying a Hugo Website on Netlify
Create a Hugo Project
1. Create a Hugo Website:
Make sure you have Hugo installed on your local machine. You can create a new Hugo site using the following command:

2. Initialize Git:
Initialize a Git repository in your project directory by following the steps:

3. Choose a Theme:
Now we have to choose a Hugo theme. Pick a Hugo theme you'd like to use for your website. You can find themes on the Hugo Themes website (https://themes.gohugo.io/). I have picked roxo-hugo, as it's a clean and minimalistic theme that is perfectly suited for presenting any kind of content in an elegant and straightforward manner.
4. Add Content:
Copy the content of the themes/roxo-hugo/exampleSite folder to the site’s root directory.
5. Configure Site Settings:
Configure your site's settings in the `config.toml` file, including theme selection, site title, and other customization options.
6. Test Locally:
Run a local server to preview your site:

7. Commit to remote a Git Repository:
Finally, commit your Hugo site's files to a GitHub repository.
Create a Netlify Account
1. Visit Netlify's Website:
Open your web browser and navigate to app.netlify.com.
2. Choose Your Signup Method:
On the Netlify homepage, you'll have the option to sign up using various methods. The most common method is through a hosted Git provider, such as GitHub or GitLab. However, you can also choose to sign up using your email address, if you prefer.
3. Sign Up with Hosted Git Provider:
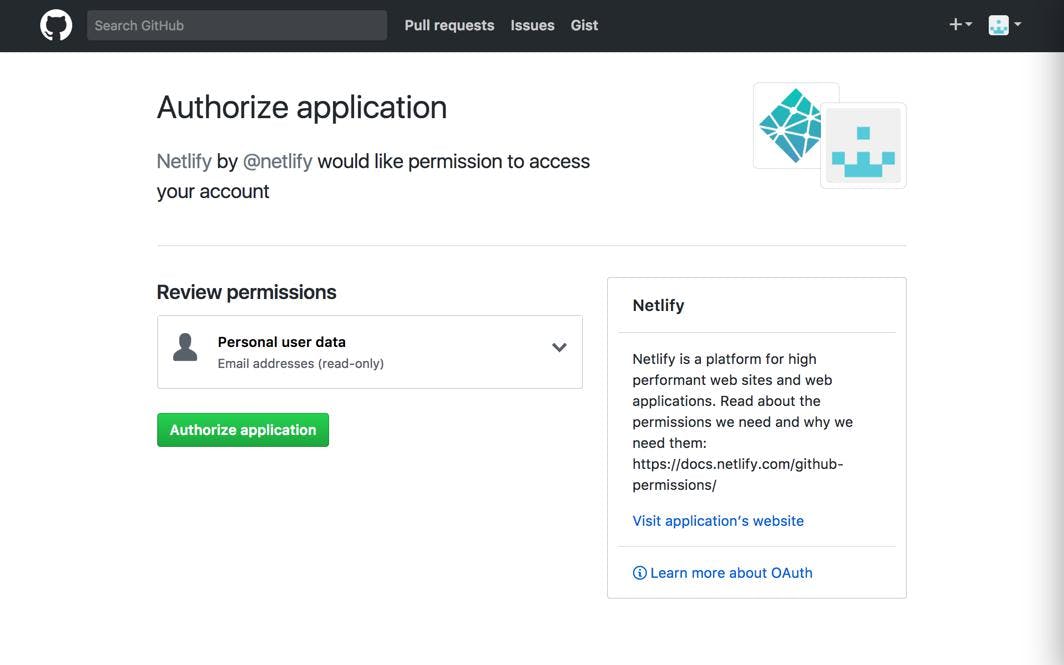
If you select a hosted Git provider, you'll be prompted to authorize Netlify's access to your Git repository. This connection allows Netlify to automatically deploy your site whenever you make updates to your repository.

4. Authorize Netlify:
Follow the prompts to authorize Netlify's access to your repository. This authorization is necessary for Netlify to pull the code and trigger deployments based on your updates.

5. Complete the Signup Process:
Depending on your selected signup method, you might need to follow additional steps to complete the registration process. This could involve granting permissions, connecting your Git account, or verifying your email address.
By signing up on Netlify, you'll gain access to the platform's powerful features, including automatic deployments, continuous integration, and more. This will enable you to seamlessly deploy and manage your Hugo website without the hassle of complex configurations.
Deploy Hugo projects on Netlify
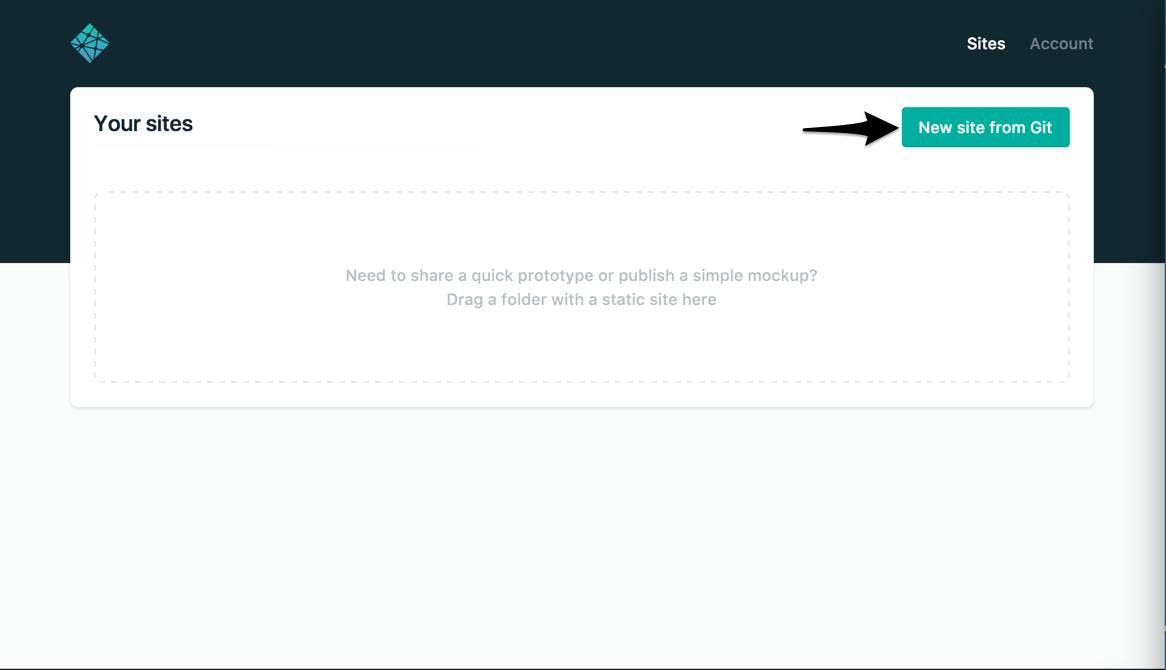
After signing in to Netlify, click "New site from Git" on your Netlify dashboard.

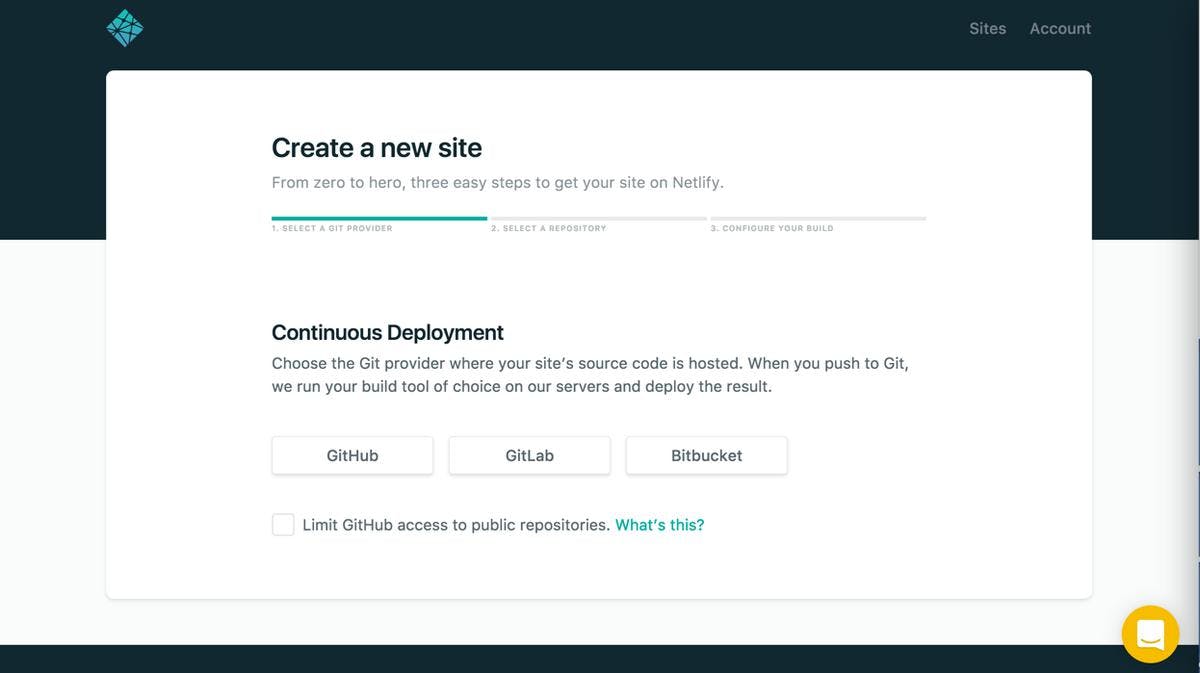
Netlify's guided process for continuous deployment will now take you through the necessary steps. Initially, you'll be prompted to choose your git provider once more. However, this time, you'll be granting Netlify additional permissions for your repositories.

Then authorize the GitHub repo with the GitHub authorization modal:

Now, select the repo you want to link to your site in Netlify:

After making your selection, you'll be directed to a screen for the initial setup. On this screen, you have the option to choose the branch you wish to publish, specify your build command, and set your publish (deployment) directory. Your branch should be master or main. The deployment directory should be public, as it is the default for HUGO.
The build command should be like the following:
- Build Command: Hugo
- Publish Directory: public
- Finally, click "Deploy Site" to deploy the site.

How to Deploy Your Site to Vercel
Site Setting
Upon completing the build process, you'll be redirected to the site overview interface. However, it's important to note that directly accessing the URL provided in this overview won't render your website correctly as it mismatches the baseUrl, defined in your config.toml file. To fix the problem, follow these steps:
- Within the site overview, refrain from accessing the URL presented.
- Instead, proceed by selecting "Deploy settings."
- Under the "General" section, locate and choose "Site details."
- Inside the "Site details" tab, opt to modify the site name by clicking "Change site name."
- In the ensuing dialogue box, specify your desired new site name and confirm the change.
With the name updated, you can now access your website using the URL displayed in the site overview. Netlify will build your Hugo website and deploy it to a distinct subdomain. If you want, you can also configure a custom domain as required.
If you're feeling uncertain about where to begin, Staticmania will be there for you. Our team of skilled experts is ready to assist you from creating a new HUGO site to deploying your Hugo website on Netlify. Contact us now to kickstart your project.


